
As promised in me precedent article, I’ll show today you how to configure your virtual machine such that you can use SQL Developer, or any other tool you like, on the Mac and still connect to you’re Oracle 11g instance.
01. Configure the Virtual Machine
- Shut down the operating system in your virtual machine.
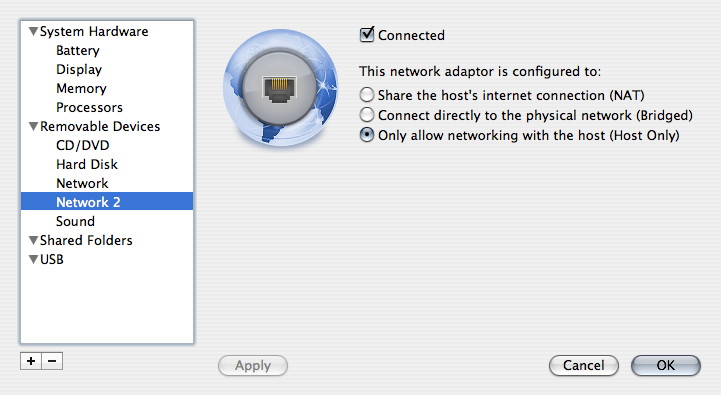
- Add a second nework adapter tour your virtual machine by going into Settings and then clicking on the + button and choosing Add Network…
- Configure the second network as follow.
02. Configure your Entreprise Linux
- Login as root.
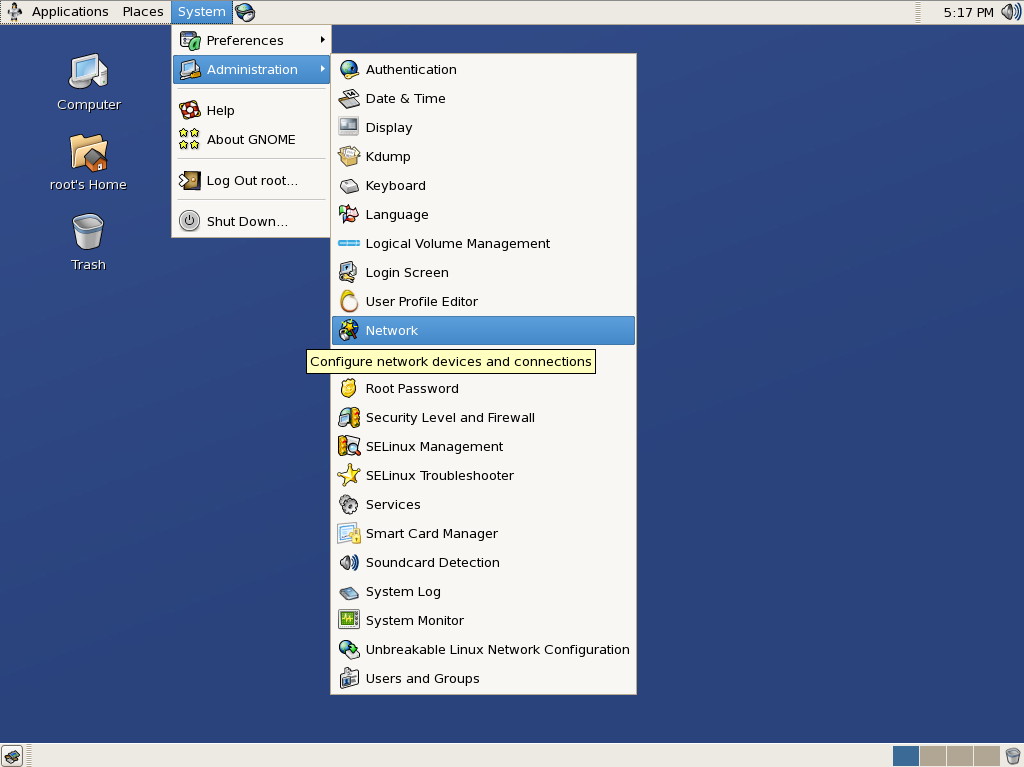
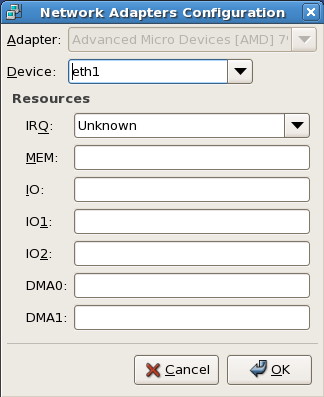
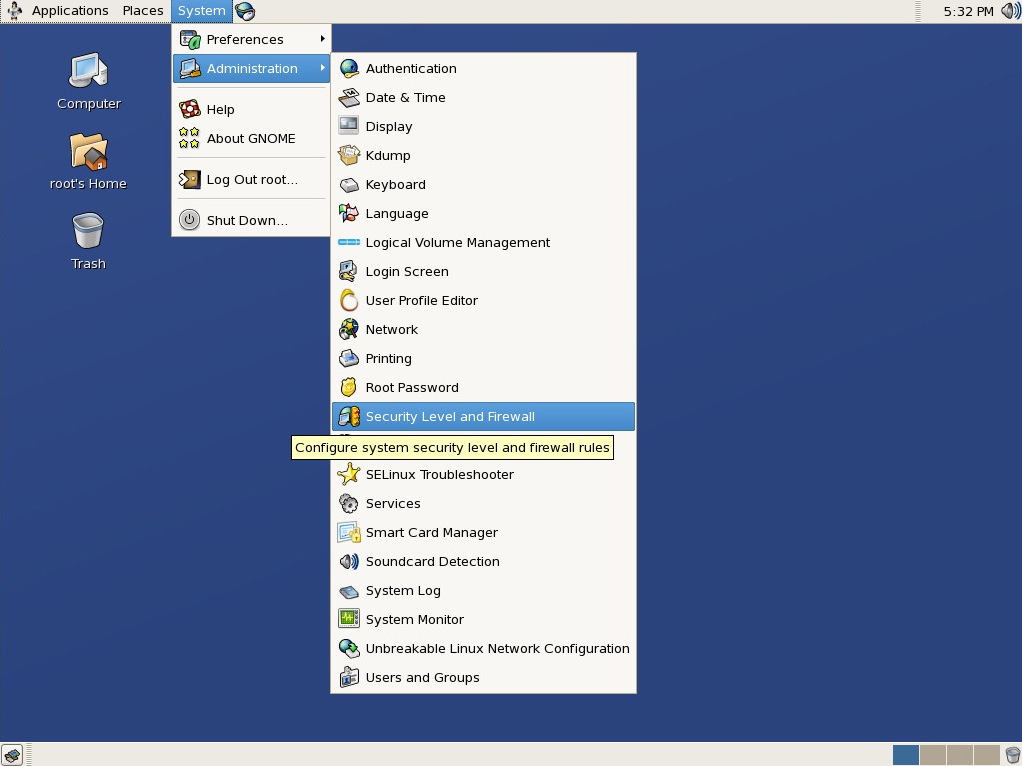
- Go under menu System, Administration, Network.
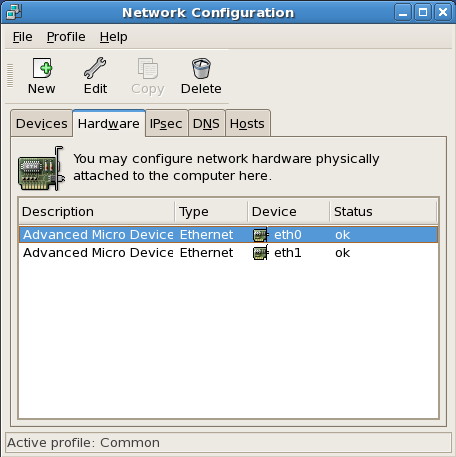
- Under tab Hardware select New.
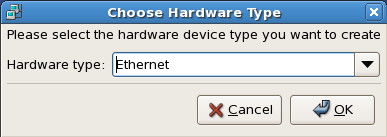
- In the drop down list choose Ethernet, then click OK.
- Configure as follow.
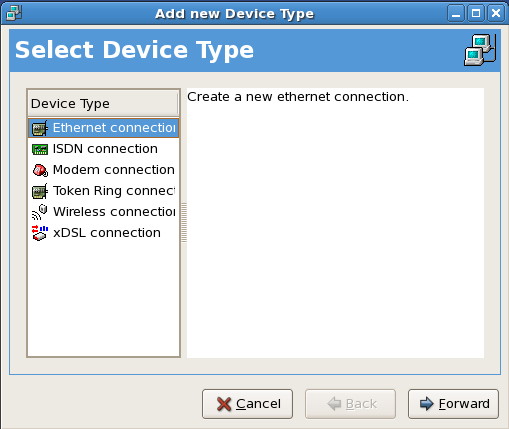
- Under tab Devices select New.
- In the list choose Ethernet connection and then click Forward.
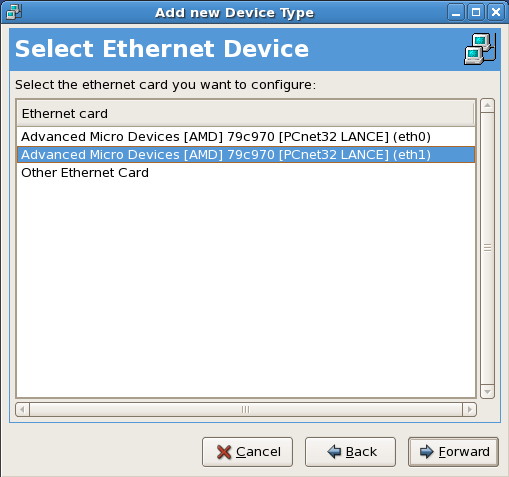
- Select your interface on eth1 and then click Forward.
- Select Staticaly set IP addresses: and fill the Address and Subnet mask fields with meaningful values. [update]This meaningful address can be determined on the Mac by issuing an
ifconfigin the terminal. From the output, you have to determine the two virtual interfaces used by vmware. They are normally named vmnetX, where X is a number. The trick is to discover wich one is used for the local network. I don’t know if there is an deterministic way to do that. I’ve determined it the empirical way.[/update] Finally click Apply.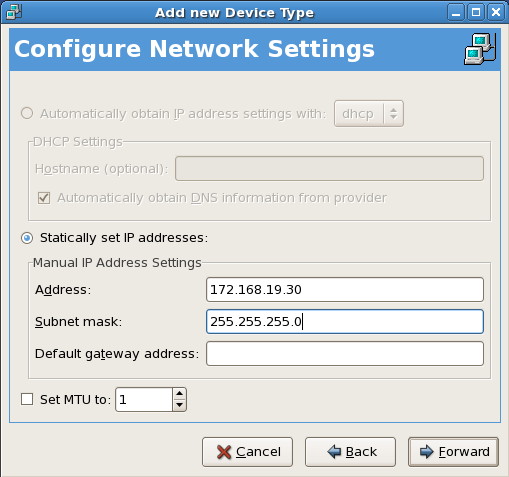
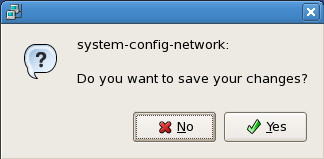
- Close the window Network Configuration and say Yes when you’re asked if you want to save your changes.
- Go under menu System, Administration, Security Level and Firewall.
- Under tab Firewall Options, open the pane Other Ports and click Add.

- In field Port(s) enter 1158 (this is for Oracle Entreprise Manager) and in the drop down list choose tcp and click OK.

- Do the same as in point 13 but with port number 1521 (this is for your Oracle database instance).
- Click Apply and then OK.
- Reboot your virtual machine.
03. Configure the Mac
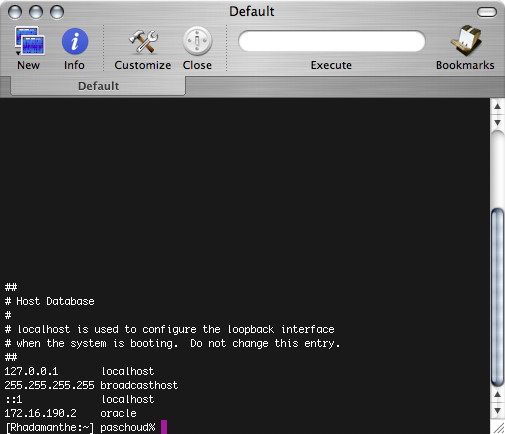
- Open a terminal and add append to the file /etc/hosts the following line
172.168.19.30 oracle
You need to be admin in order to modify this file. With this modification you now indicate to your Mac that when you enter oracle you would like to reach the IP address 172.168.19.30. Of course you have to enter the same IP address as the one you provide in point 9 from section 2.
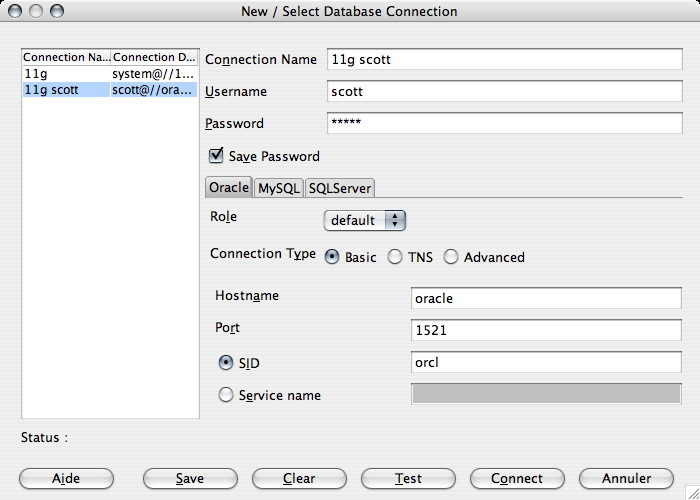
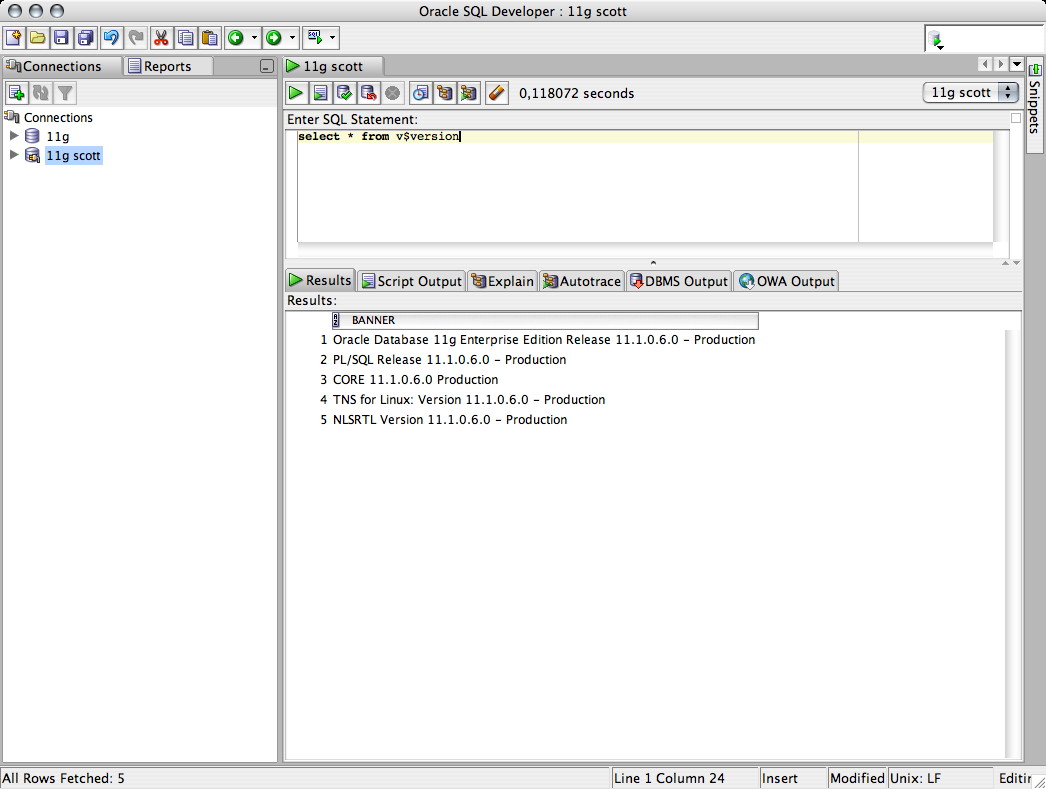
- Startup your SQL Developer add a new connection and enjoy.
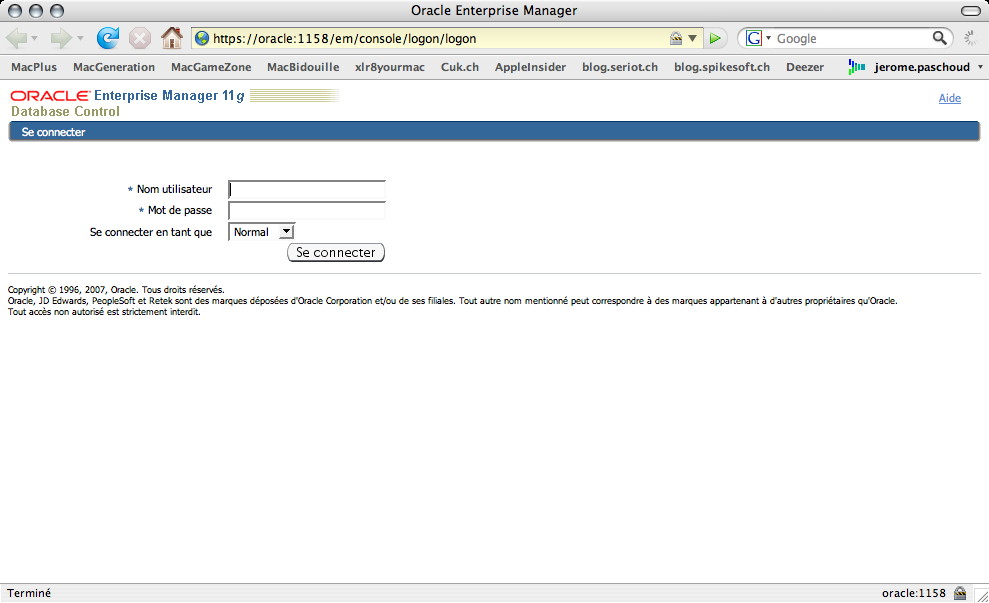
- If you also started the Oracle Entreprise Manager you can also reach it from the Mac.
04. Conclusion
With this serie of two articles you’re now run the latest Oracle database version available on your Mac. You can connect to your database instance even if you’re not connected to the internet and you can also reach the internet from within your virtual machine.