
So far you’ve learned how to install an Oracle 11g Database, how to access it from your Mac with SQLDeveloper and now the last missing part of the puzzle for a comfortable work is SQL*Plus. It’s not the sexiest tool of Oracle, but it’s the one you’ll find on every machine that is able to do some serious work. So let’s see how to install SQL*Plus on your Mac.
01. Prerequisite
- Instant Client Package – Basic from Instant Client Downloads for Mac OS X
- Instant Client Package – SQL*Plus from Instant Client Downloads for Mac OS X
- You use tcsh as shell
Don’t be afraid if the download page says PowerPC it will also run on your brand new Intel Mac.
02. Installation
- Create a directory to save all the needed libraries and programs. I personnaly chose to create this directory in
/usr/local/bin.sudo mkdir /usr/local/bin/oracle
- Change the owner of the newly created user to your current user.
sudo chown your_user /usr/local/bin/oracle
- Open the oracle directory in the finder.
open /usr/local/bin/oracle
- Copy the following elements in the folder:
- sqlplus from Instant Client Package – SQL*Plus package
- libsqlplus.dylib from Instant Client Package – SQL*Plus package
- libociei.dylib from Instant Client Package – Basic package
- libclntsh.dylib.10.1 from Instant Client Package – Basic package
- libsqlplus.dylib from Instant Client Package – Basic package
- libnnz10.dylib from Instant Client Package – Basic package

- Edit you
.cshrcand add the following lines:setenv DYLD_LIBRARY_PATH /usr/local/bin/oracle setenv ORACLE_HOME /usr/local/bin/oracle setenv TNS_ADMIN /usr/local/bin/oracle setenv PATH /usr/local/bin/oracle:$PATH
- Add in the oracle directory a file
tnsnames.orawith the following content where the name after the HOST = part (on the 3rd line) is the hostname of the instance running your database:ORCL = (DESCRIPTION = (ADDRESS = (PROTOCOL = TCP)(HOST = oracle)(PORT = 1521)) (CONNECT_DATA = (SERVER = DEDICATED) (SERVICE_NAME = orcl) ) ) - You can now open a new terminal and connect to your database instance by issuing:
sqlplus scott@orcl
03. Nice to have
- As you certainly knows if you use a bit the standard SQL*Plus, it’s an absoute pain that you don’t have any line editing option or any history except the last executed command. Hopefully you’re in a Unix environement and you have the utility rlwrap that does exactly what you need. Install it with fink (you first have to update your package repository in order to find the rlwarp package). Once rlwrap is installed add the following line to your
.cshrc:alias sqlplus 'rlwrap sqlplus'
Now you can enjoy an Unix like SQL*Plus.
- You can save your oracle directory to be an absolute mess by moving all your scripts into another directory. I chose to create a scripts directory in my oracle directory. In order to tell SQL*Plus that you’ve such an organisation you have to add the following line to your
.cshrc:setenv SQLPATH /usr/local/bin/oracle/scripts
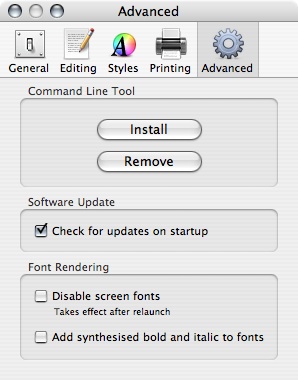
- Last but not least, as you’re a Mac user, you would like to use the best of your platform (inst’it). That is why instead of using the ugly vi or any other Unix text editor, you can use the only good text editor that exist for Mac: SubEthaEdit. Once you installed it go into Preferences under Advanced and install the command line tool. Once done add to your
login.sqlandconnect.sqlscript the following line:define _editor=see
Congratulations you just install SQL*Plus on the Mac. You now have a fully usable Oracle development environment with a bit of Mac taste.